Blogger has not exactly been pushing out updates over the past years – in fact, its official blog has been silent since 2020. One might even suspect it’s on life support inside Google, and the only reason it’s up and running is that higher-up executives largely forgot it’s still around (although with the current tech slump they might rediscover and seek to eliminate this errant source of expenses). When updates do happen, users are caught by surprise and have to chase details on the help forums – for instance earlier this year after an update to the image delivery system that altered URLs, removing the initial image file name, and annoyed many people. Fortunately, the file name returned after a couple of weeks, maybe because of the complaints, maybe because the team behind it realized it was a silly choice to display a random string of characters instead of a readable file name.
In the absence of official information, I suspect this update did more than switch around some image URLs, as I recently discovered that Blogger now accepts the .webp format in the image upload dialog! This was a long-standing complaint against Blogger; for a system maintained by Google, it was woefully out of date in its support for newer image formats that Google itself developed and popularized. The upload interface still lists only .jpg, .gif, and .png as supported, but selecting a .webp file for upload just works now: you get a file URL in the HTML code, and the image renders like any other.
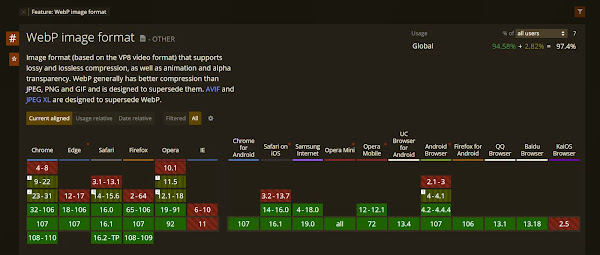
Since then I started to use WebP images on the blog as well. When I comment on articles I usually upload a picture or illustration from the linked piece, and since many sites now use WebP regularly, this saves me the step of converting these to JPEG. Despite the smaller file size, I don’t quite like the way lossy WebP compresses image data, so I don’t plan to reencode JPEG images to WebP. Lossless WebP on the other hand is a clear improvement over PNG with its smaller size for the same image quality, so I will use WebP for charts and screenshots going forward.

Another thing I noticed since I started uploading WebP images is that in Firefox they seem to be converted to jpeg: despite having a .webp URL, saving the file automatically switches to jpeg format. I noticed a similar weird behavior on many sites, where images appear as jpeg, but when you save them they switch to WebP, which I assume is a feature of their CDN. In Blogger’s case it’s an odd choice, as Firefox fully supports WebP for a while; I can only guess it’s one of Google’s passive-aggressive tactics to promote Chrome above other browsers, in this case delivering larger files to Firefox thus making it appear slower by comparison.
The Blogger content delivery system has some other semi-hidden features based on parameters in the image url. One controls the image dimension by specifying its largest size, width or height with codes such as /s250, /w100 or /h350 – I made use of this in my responsive images workflow years ago, which I still use for larger images sizes. Another code (/rw) can force the image format to .webp, whereas /cc crops the original image into a circle – pretty useful for logos or avatars – I discovered both on the help forums. Perhaps there are additional parameters available, but absent any public documentation we’re left waiting for some Google engineer to share them, or randomly trying out codes until something works.
Now that Blogger silently added support, the question remained: how do I generate my own WebP files? Windows introduced WebP codecs sometime in 2018 through a Store app. So on most systems you can view them in Explorer and convert them by opening in Paint and saving to other formats, but that doesn’t work in reverse. After some quick searching I found surprisingly little conversion options for the desktop. One is a Google-developed command-line tool, which feels too complex for my light use, the other a web app called Squoosh.

Overall Squoosh is great for this purpose. It can be installed locally and it works offline just as you would use Paint. You can open files in other formats or even load images from the clipboard (!), then select the compression algorithm with various options, compare the original image with the converted version, and save the end result locally. A minor downside of Squoosh is that it only handles one image at a time, which makes sense considering you get to preview the final image.
The more annoying issue is that the app doesn’t remember your last chosen settings, defaulting instead to MozJPEG. Since I generally use it for WebP conversions, I need to reselect the compression options each time, even when I load a second image without closing and reopening the app. There’s a long-standing feature request on GitHub to add user presets, but after almost four years I doubt it will ever get implemented. This may be a different example of Google’s oddly dysfunctional processes, in this case creating cool tools and features, only to abandon them after the initial rush of excitement wears off.
Post a Comment